Install CouchDB (latest) for Ubuntu
Enabling the Apache CouchDB package repository.
Replace trusty (Ubuntu 14.04) with xenial if you are running Ubuntu 16.04.
echo "deb https://apache.bintray.com/couchdb-deb trusty main" \ | sudo tee -a /etc/apt/sources.listInstall the repository key, update the repository cache and install the package.
curl -L https://couchdb.apache.org/repo/bintray-pubkey.asc \ | sudo apt-key add -sudo apt-get update && sudo apt-get install couchdbDuring installation you shall be promoted for a few things.
- Setup: select
Standalone / Single Node, since we shall only use single database server. - IP: use
0.0.0.0(since we require external access to submit crash report and view report,127.0.0.1only allow local access) - Admin Password: pick a strong password as external party access the login.
If you forgotten to setup the IP properly (default is 127.0.0.1), edit /opt/couchdb/etc/local.ini (used to be /etc/couchdb/local.ini).
[chttpd]
;port = 5984
bind_address = 0.0.0.0
Restart if IP is changed.
sudo service couchdb restartTest if CouchDB can be access accessed.
curl http://[SERVER]:5984/Setup Acralyzer
Access CouchDB Web UI Fauxton at http://[SERVER]:5984/_utils/, login with the admin username and password.
From the left menu, select Replication -> New Replication.

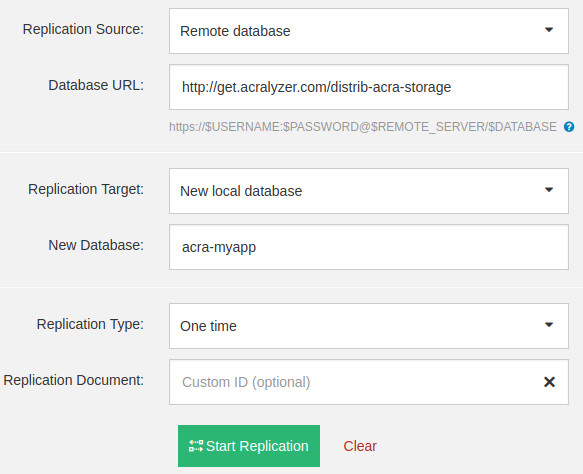
First we shall create the database for our app.
- Replication Source: Remote Database
- Database URL:
http://get.acralyzer.com/distrib-acra-storage - Replication Target: New Local Database
- New Database:
acra-myapp(you can replacemyappwith anything, but the database name must start withacra-) - Replication Type: One time
Then we shall create the database for Acralyzer.
- Replication Source: Remote Database
- Database URL:
http://get.acralyzer.com/distrib-acralyzer - Replication Target: New Local Database
- New Database:
acralyzer - Replication Type: One time
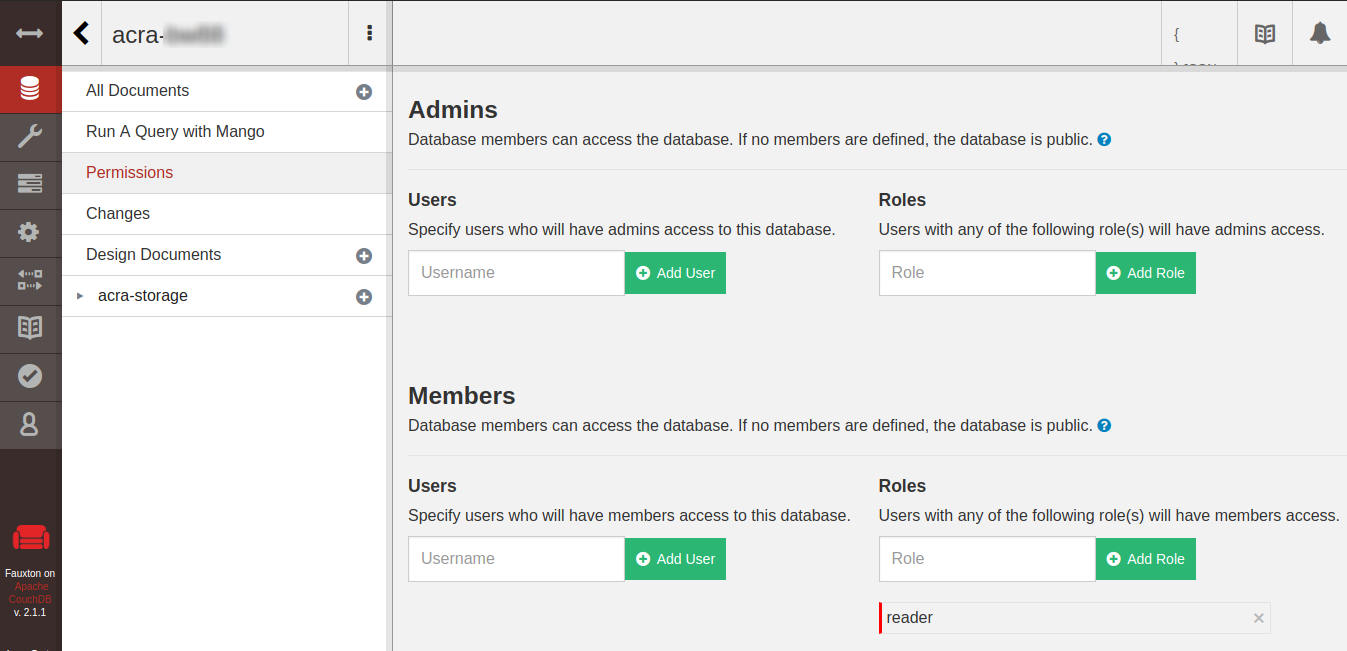
Secure access to database
TIPS: If no members (Users or Roles) are defined, the database is public.
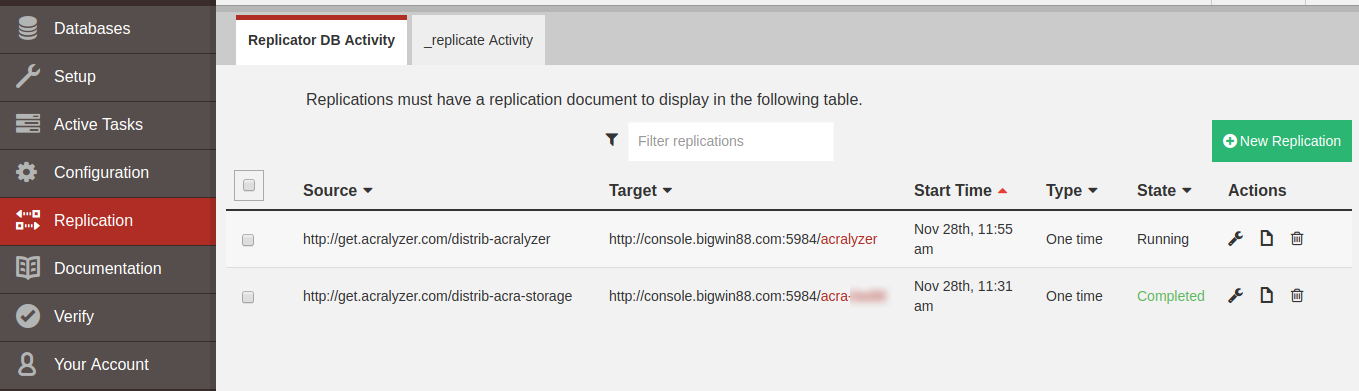
The replication could take up to 5 minutes or more, you can check the status at Replication or Databases from the left menu.
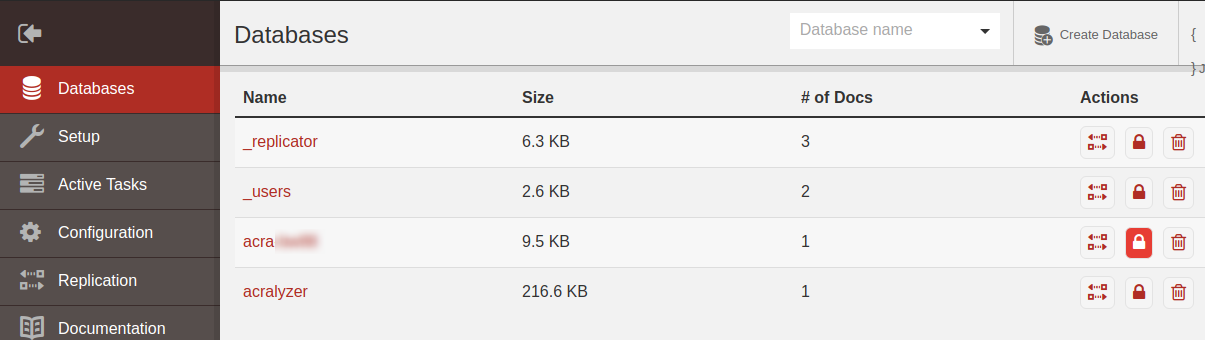
From the left menu, select Databases, find acra-myapp and click on Security / Set permission for (Lock icon).
Select Database -> Security -> Members -> Roles, fille in "reader" and click Add Role.
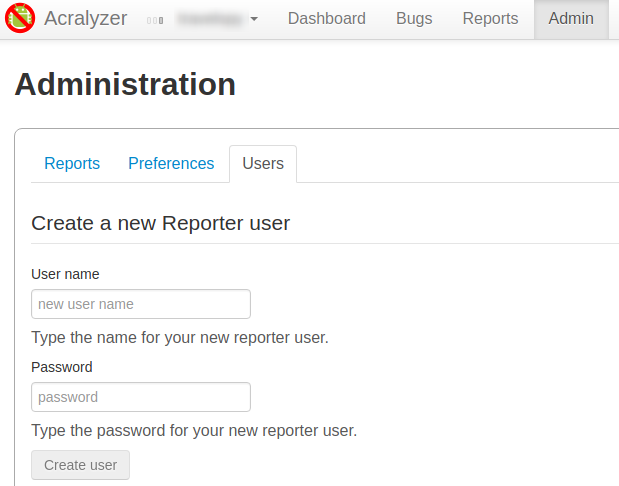
Create Reporter user
Access Acralyser UI at http://[SERVER]:5984/acralyzer/_design/acralyzer/index.html.
Click Admin -> Users -> Create a new Reporter user, key in User name and password and click Create user.
Setup Android App
Setup gradle dependencies: compile 'ch.acra:acra:4.8.5'. (check latest version)
In you Android Application class, use the following code.
@ReportsCrashes( httpMethod = HttpSender.Method.PUT, reportType = HttpSender.Type.JSON, formUri = "http://[SERVER]:5984/acra-[myapp]/_design/acra-storage/_update/report", formUriBasicAuthLogin = "[REPORTER_USERNAME]", formUriBasicAuthPassword = "[REPORTER_PASSWORD]")public class MyApplication extends Application { @Override public final void onCreate() { super.onCreate(); ACRA.init(this); }}References: