Android Crash Reporting Solutions
- You can use standard Google Play Crashes and Application Not Responding (ANR) error reports which works by default without any coding or configuration (as long as you publish on Google Play). The main drawback is not all android phone/user send back the crash report.
- You can use ACRA - Application Crash Reports for Android which is pretty easy to setup and configure. The main obstable is the backend server. I used Tracepot (before the pricing started) which support a free tier, but I believed the free tier doesn't support ProGuard de-obfuscation (I didn't really test it). You can roll out your own ACRA backend with CouchDB, it works but not great, with some security risk (I forgot to update to latest
CouchDBand was hacked) and I fail to configure SSL on CouchDB (or didn't try hard enough). - Firebase Crash Reporting is deprecated in favour of
Crashlytics.
I pick Firebase Crashlytics because
- It's free (I am not aware of any limit)
- It's a google/firebase product (Crashanalytics used to be a standalone product by Fabric), so pretty good integration with existing android tools and libraries
- Reporting UI looks good
Add Firebase to Android Project
You can SKIP this steps if you already added Firebase to your Android Project.
Before you start adding Crashlytics SDK, you need to setup Firebase first. I have written How To Add Firebase To Android (with existing Google Project) back in Aug 2017, but I will write an updated guide for new project here.
NOTE: the documentation mentioned prerequisites of Android 4.0 (Ice Cream Sandwich) or newer, and Google Play services 15.0.0 or higher.
In Android Studio, goto Tools -> Firebase -> Analytics -> Log an Analytics Event.
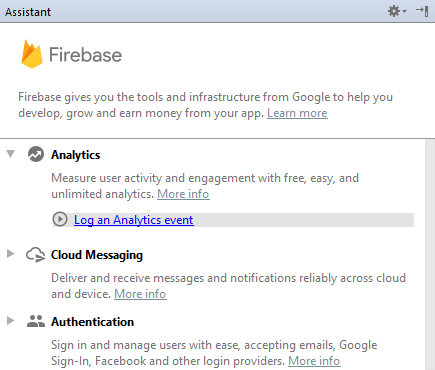
NOTE: It might seems strange to add Analytics when we want to add Crashlytics. There is no Crashlytics options yet (I suspect work in progress of integrating Crashlytics into Firebase). Anyway, we just use Analytics to add and setup Firebase.
Click Connect your app to Firebase. You can Create new Firebase project or Choose an existing Firebase or Google project.
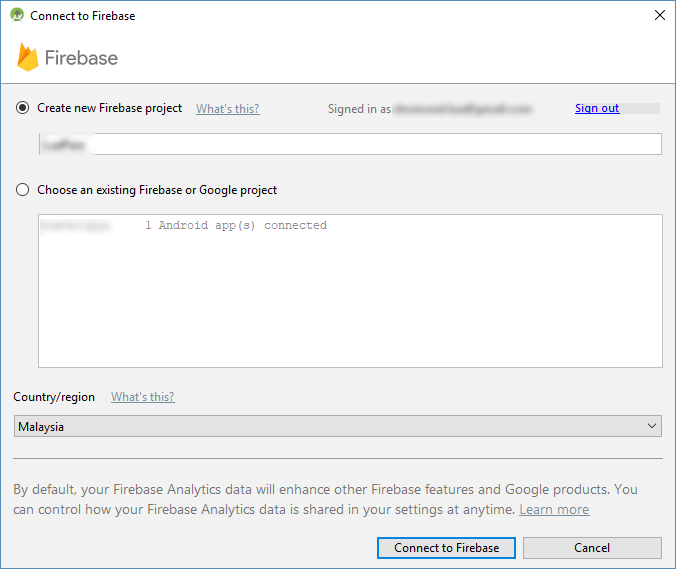
Upon success, you should see Connected for Step 1.

NOTE: A file named google-services.json should exist in app/google-services.json. You can't see it in Android view (left project files panel in Android Studio), select Project Files view instead.
NOTE: It seems like the Android Studio wizard automatically create project id (e.g. projectname-eaa23) and storage_bucket (e.g. projectname-eaa23.appspot.com). I believe there is no way change these once created. If the project id matter to you, you might want to explore Manually Add Firebase (I didn't tried this method before) or create your Google Cloud Project first then import the project into Firebase.
Click Add Analytics to your app for Step 2.
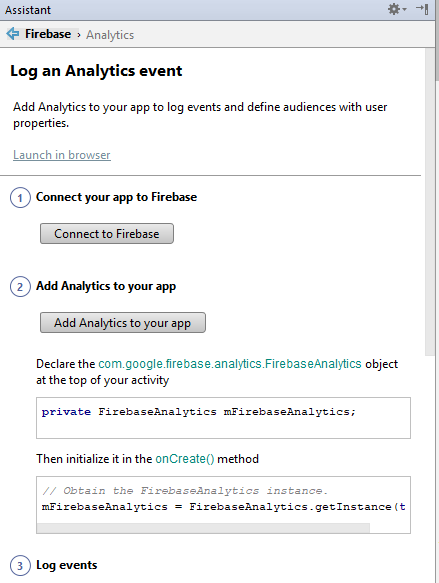
The following configrations shall be added:
build.gradle (project-level)

    Add Firebase Gradle buildscript dependency
        classpath 'com.google.gms:google-services:3.1.1'

app/build.gradle

    Add Firebase plugin for Gradle
        apply plugin: 'com.google.gms.google-services'

    build.gradle will include these new dependencies:
        compile 'com.google.firebase:firebase-core:11.8.0'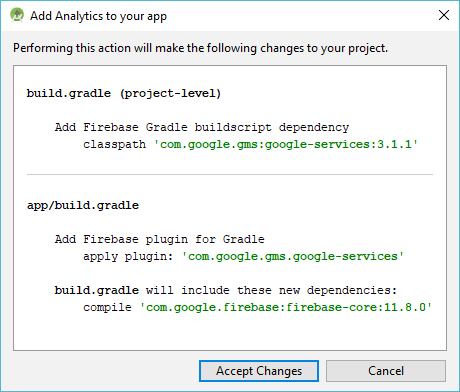
NOTE: The documentation mentioned For full functionality, Crashlytics requires use of firebase-core version 11.4.2 or greater. I tested com.crashlytics.sdk.android:crashlytics:2.9.1 works even without com.google.firebase:firebase-core:12.0.1 included. If you want analytics beside crash reporting, it doesn't hurt to include com.google.firebase:firebase-core as well.
NOTE: com.google.firebase:firebase-core is a recommended alias for the com.google.firebase:firebase-analytics library
NOTE: check Firebase Android Latest Releases
Enable Android MultiDex
Try compile to check for issues. You might bump into the following error
org.gradle.api.tasks.TaskExecutionException: Execution failed for task ':app:transformDexArchiveWithExternalLibsDexMergerForDebug'. at org.gradle.api.internal.tasks.execution.ExecuteActionsTaskExecuter.executeActions(ExecuteActionsTaskExecuter.java:100) ... Caused by: java.lang.RuntimeException: com.android.builder.dexing.DexArchiveMergerException: Error while merging dex archives: ... The number of method references in a .dex file cannot exceed 64K. Learn how to resolve this issue at https://developer.android.com/tools/building/multidex.html
You need to enable MultiDex due to exceeding 64K Methods limit by importing those Firebase libraries.
Edit your module build.gradle.
android {
    defaultConfig {
        applicationId "..."
        multiDexEnabled true
    }
}

dependencies {
    // https://mvnrepository.com/artifact/com.android.support/multidex
    implementation 'com.android.support:multidex:1.0.3'
}
If you override Application, change it to extend MultiDexApplication.
public class MyApplication extends MultiDexApplication { ... }If you do not override Application, edit your AndroidManifest.xml.
<manifest xmlns:android="http://schemas.android.com/apk/res/android"
    package="com.mycompany.myapp">
    <application
            android:name="android.support.multidex.MultiDexApplication" >
        ...
    </application>
</manifest>
NOTE: You no longer need a dev mode to enable multi-dexing during development
Enable Crashlytics in Firebase Console
Goto Firebase Console - Crashlytics and select your project.
To link Crashlytics to Firebase, you shall be asked Is this app new to Crashlytics?.
Strangely, for our case it is recommended to pick No, it already has Crashlytics. If you pick Yes, I believe you shall be asked to create account in Fabric, which is unecessary for our case.
UPDATE 2018-07-20: If I click No, I have to click on Link App In Fabric which redirect to a Fabric page and require a Fabric login. Instead, I click Yes (Step 1) this time, click on Open SDK (this will highlight Step 2 into Blue). Step 3 awaiting report is activated when I send a crash test from my app.
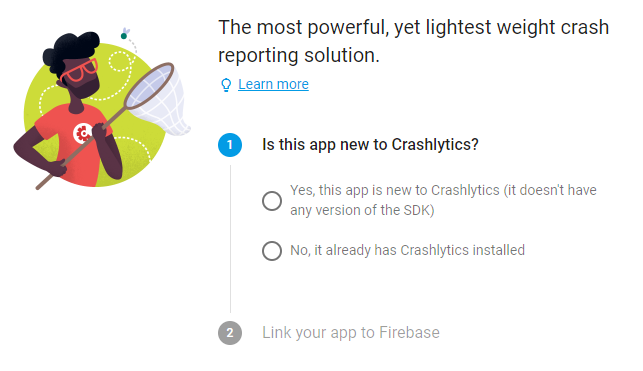
comment: # (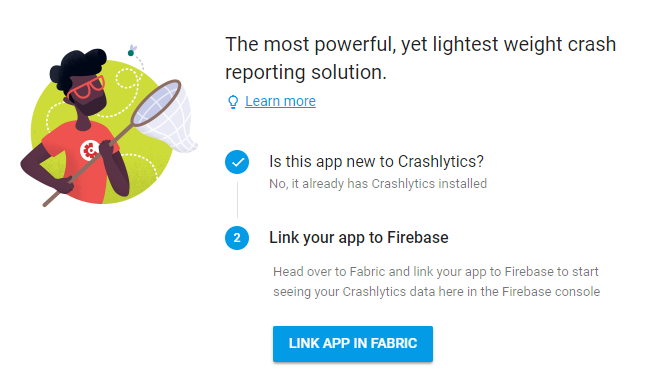 )
)
comment: # (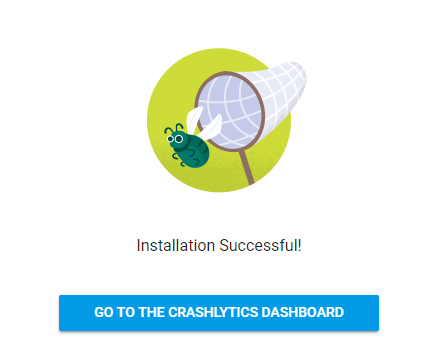 )
)
Add Crashlytics SDK to Android Project
Edit your project build.gradle.
buildscript {
    repositories {
        // ...
        maven {
          // https://docs.fabric.io/android/changelog.html#fabric-gradle-plugin
           url 'https://maven.fabric.io/public'
        }
    }
    dependencies {
        // ...
        classpath 'io.fabric.tools:gradle:1.25.2'
    }
}
Make sure you included google maven repository as well.
allprojects {
    // ...
    repositories {
        // maven { url 'https://maven.google.com/' }
        google()
    }
}
Edit app/module build.gradle.
apply plugin: 'io.fabric'

dependencies {
    // https://mvnrepository.com/artifact/com.crashlytics.sdk.android/crashlytics
    implementation 'com.crashlytics.sdk.android:crashlytics:2.9.1'
}
NOTE: If you bump into API 'variant.getExternalNativeBuildTasks()' is obsolete and has been replaced with 'variant.getExternalNativeBuildProviders()' warning, use classpath 'io.fabric.tools:gradle:1.28.1'
Test Crashlytics
You can force a crash for testing purpose.
Crashlytics.getInstance().crash()NOTE: The code above actually trigger an exception which stop the app.
java.lang.ArrayIndexOutOfBoundsException: length=2; index=10
    at com.crashlytics.android.core.CrashTest.indexOutOfBounds(CrashTest.java:30)
    at com.crashlytics.android.core.CrashlyticsCore.crash(CrashlyticsCore.java:622)
    at com.crashlytics.android.Crashlytics.crash(Crashlytics.java:323)
By default, Crashlytics is enabled even in debug mode.
To view crash report, goto Firebase Console, select your project and pick Crashlytics from left navigation panel.
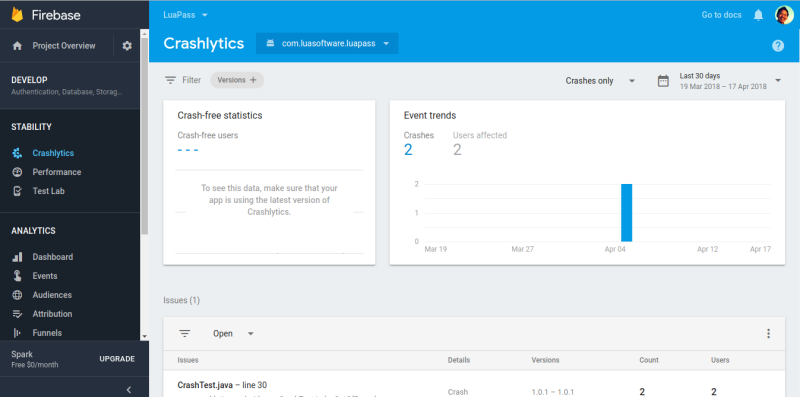
NOTE: if you bump into Crashlytics found an invalid API key: null. Check the Crashlytics plugin to make sure that the application has been added successfully! error, it probably means you didn't Add Firebase To Your Project (or missing google-services.json file) or didn't Enable Crashlytics in Firebase Console.
Disable Crashlytics in debug mode
Edit app/module build.gradle.
android {
    // ...
    buildTypes {
        debug {
            // https://docs.fabric.io/android/crashlytics/build-tools.html
            // Only use this flag on builds you don't proguard or upload to beta-by-crashlytics
            // ext.alwaysUpdateBuildId = false
            // Disable fabric build ID generation for debug builds
            ext.enableCrashlytics = false
            manifestPlaceholders = [crashlyticsEnabled: false]
        }
        release {
            manifestPlaceholders = [crashlyticsEnabled: true]
            minifyEnabled false
            proguardFiles getDefaultProguardFile('proguard-android.txt'), 'proguard-rules.pro'
        }
    }
}
Edit AndroidManifest.xml.
<?xml version="1.0" encoding="utf-8"?>
<manifest ...>
    <application ...>

        <meta-data
            android:name="firebase_crashlytics_collection_enabled"
            android:value="${crashlyticsEnabled}" />

        ...

    </application>
</manifest>
NOTE: you shall bump into This app relies on Crashlytics. Please sign up for access error if you set ext.enableCrashlytics = false without <meta-data android:name="firebase_crashlytics_collection_enabled" android:value="false" />
Crashlytics Proguard
Refer to Configure ProGuard and Get deobfuscated crash reports
# https://firebase.google.com/docs/crashlytics/get-deobfuscated-reports
-keepattributes *Annotation*
-keepattributes SourceFile,LineNumberTable
-keep public class * extends java.lang.Exception

# To let Crashlytics automatically upload the ProGuard or DexGuard mapping file, remove this line from the config file
# -printmapping mapping.txt

-keep class com.crashlytics.** { *; }
-dontwarn com.crashlytics.**
References: